
The Tzumi 6696DG is a modern alarm clock with wireless charging, Bluetooth, and FM radio features. It offers dual alarms, a bright LED display, and easy customization options. Designed for simplicity and functionality, this clock is perfect for daily use. The user manual provides detailed setup and troubleshooting guides, ensuring a seamless experience. An ideal choice for those seeking a reliable and feature-rich alarm clock.
1.1 Overview of the Tzumi 6696DG Model
The Tzumi 6696DG is a sleek, modern alarm clock designed for versatility and convenience. It features a clear LED display, dual alarm functionality, and wireless charging capabilities. The device also includes Bluetooth connectivity, FM radio, and auxiliary input options, making it a multifunctional addition to any bedroom; Its compact design and user-friendly interface ensure easy operation, while its robust build guarantees long-lasting performance. Perfect for enhancing your morning routine with advanced features and reliability.
1.2 Key Features of the Alarm Clock
The Tzumi 6696DG boasts dual alarms, wireless charging, and Bluetooth connectivity for seamless music streaming. It features an FM radio, AUX, and TF card modes for diverse audio options. The LED display offers adjustable brightness, while volume controls allow personalized sound levels. Battery-powered with low-battery alerts, it ensures uninterrupted functionality. Additional features include an hourly chime and military time options, making it a versatile and user-friendly alarm clock for modern lifestyles.

Unboxing and Initial Setup
Carefully unbox the Tzumi 6696DG and inspect its contents. Place it on a stable surface, ensuring good visibility and accessibility. Insert batteries if not pre-installed. Prepare for setup.
2.1 Unpacking the Device
Gently open the box and remove the Tzumi 6696DG alarm clock. Carefully unpack all included accessories, such as the user manual, batteries, and any charging cables. Inspect the device for any visible damage. Ensure all components are accounted for before proceeding. Take a moment to familiarize yourself with the clock’s buttons and display. This step ensures a smooth setup process. Read the manual to understand the device’s features and operation.
2.2 Placing the Alarm Clock
Position the Tzumi 6696DG on a stable, flat surface, such as a bedside table or shelf. Ensure it is within easy reach to operate the buttons. Place it away from direct sunlight to avoid glare on the display. Keep it near a power outlet if using the AC adapter. Choose a quiet location to minimize disturbances. Ensure proper airflow to prevent overheating. This placement ensures optimal performance and easy access to features like Bluetooth and FM radio.
2.3 Inserting Batteries
To ensure your Tzumi 6696DG alarm clock continues to function during power outages, insert 2 AAA batteries into the compartment located at the back. Open the battery cover by sliding it downward. Align the batteries with the correct polarity (+ and ─ signs matched). Close the cover securely. The batteries will act as a backup power source, maintaining the time and alarm settings even when the clock is unplugged. This ensures uninterrupted functionality. Replace batteries if the display dims or alarms malfunction.

Setting Up the Time and Date
Set the time and date using the buttons on the back. Ensure accuracy for proper alarm functionality. Use the SET button to cycle through hours, minutes, and date.
3.1 Adjusting the Time Format
Press and hold the SET button to access the time format menu. Use the ↑ or ↓ buttons to switch between 12-hour and 24-hour formats. Release the SET button to save your preference. The display will update to reflect the selected format. This feature allows you to choose the time display that best suits your needs, ensuring clarity and convenience for daily use. The format change will not affect alarm settings or other functions.
3.2 Setting the Date
Press and hold the SET button until the date flashes. Use the ↑ or ↓ buttons to adjust the month, day, and year. Release SET to save. The date will update automatically, ensuring accuracy. This feature is essential for maintaining correct alarm functionality and display. The clock will retain the date even after power loss, provided batteries are installed. Follow this process to keep your clock updated and synchronized with the current date.
3.3 Switching to Military Time
Press and hold the MODE button until the time format menu appears. Use the ↑ or ↓ buttons to scroll to “Military Time” and press SET to confirm. The clock will display time in a 24-hour format. This feature is ideal for users who prefer military time for clarity and precision. The setting will remain active until changed, ensuring consistent time display. This option enhances the clock’s versatility for different user preferences.

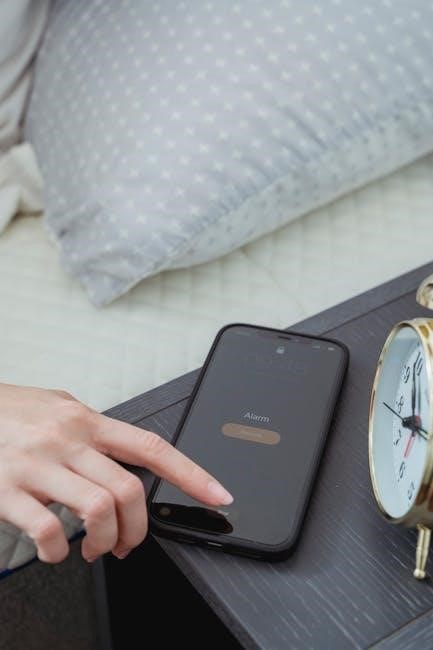
Configuring the Alarms
Press MODE to cycle through alarm settings. Use ↑ or ↓ to adjust the time for Alarm 1 and Alarm 2. Press SET to save your settings. Ensure alarms are toggled on/off as needed for reliable wake-up functionality. This feature allows for personalized scheduling to meet your daily routine requirements.
4.1 Setting Alarm 1
Press the MODE button until “Alarm 1” appears on the display. Use the ↑ or ↓ buttons to set the desired alarm time. Press SET to save. Ensure the alarm icon is displayed to confirm it’s active. Repeat the process for Alarm 2 if needed. The alarm will sound at the set time unless toggled off. This feature allows for personalized scheduling to meet your daily routine requirements effectively.
4.2 Setting Alarm 2
Press and hold the ALARM button until “Alarm 2” appears. Use the ↑ or ↓ buttons to select the desired time. Press SET to confirm. Ensure the alarm icon is visible to activate it. Repeat for Alarm 1 if needed. Both alarms can be customized for different days, offering flexibility for your schedule. Toggle alarms on/off using the ALARM button to prevent unwanted alerts. This dual-alarm feature ensures you’re always on time, no matter the day.
4.3 Turning Alarms On/Off
Press the ALARM button to cycle through Alarm 1 and Alarm 2. Use the SET button to toggle each alarm on or off. The alarm icon (⏰) will appear or disappear. For Alarm 1, press once; for Alarm 2, press twice. This feature allows you to enable or disable alarms without affecting the other. Ensure the alarm icon is visible to confirm it’s active. This simple process keeps your alarms organized and avoids unwanted wake-ups.
Customizing Your Alarm Clock
Adjust the brightness by pressing and holding the DIM button. Use the VOLUME buttons to set your preferred wake-up sound level. Enable or disable the hourly chime for a quieter experience.
5.1 Adjusting Brightness and Volume
Press the DIM button to adjust the display brightness. Hold the button to dim or brighten the light. For volume, use the VOLUME buttons to increase or decrease the alarm sound. The volume levels range from low to high, ensuring optimal wake-up effectiveness. Note that the display light may dim slightly when battery life is low. Use these controls to customize your alarm clock for a comfortable wake-up experience. Proper adjustments ensure the alarm is audible without being intrusive. Brightness and volume settings are saved automatically for convenience. Regularly check and adjust these settings to maintain your preferred comfort level. This feature enhances the overall usability of the Tzumi 6696DG alarm clock, making it adaptable to different environments. By fine-tuning brightness and volume, users can enjoy a personalized experience tailored to their needs. Adjustments are easy and intuitive, requiring minimal effort. This customization option is a key feature of the Tzumi 6696DG, designed to improve user satisfaction.
5.2 Enabling/Disabling the Hourly Chime
To enable or disable the hourly chime, press and hold the CHIME button until the indicator light toggles. The chime will sound every hour if enabled. Disabling it stops the hourly tone. This feature is convenient for users who prefer a silent environment. Adjust the chime setting as needed to suit your preferences. Refer to the maintenance section for additional details on managing the chime function effectively. Proper adjustment ensures a tailored experience.

Using Additional Features
Explore the Tzumi 6696DG’s additional features, including Bluetooth connectivity for wireless streaming, FM radio for live stations, and AUX/TF card modes for external device playback. Versatile and convenient, these features enhance your alarm clock experience with seamless integration of music and media.

6.1 Bluetooth Connectivity
The Tzumi 6696DG features Bluetooth connectivity, allowing seamless pairing with compatible devices. To connect, enable Bluetooth on your device, search for the clock, and confirm pairing. Once connected, enjoy wireless streaming of music, podcasts, or audiobooks directly to the alarm clock. This feature enhances your morning routine with high-quality audio. Ensure your device is within range for optimal performance. Bluetooth connectivity adds convenience and versatility to your alarm clock experience, making it perfect for modern lifestyles.
6.2 FM Radio Functionality
The Tzumi 6696DG features an integrated FM radio, allowing you to tune into your favorite stations. Press the radio button to switch modes and use the tuning dial or buttons to find stations. The built-in antenna ensures clear reception. You can save up to 20 preset stations for quick access. Adjust the volume using the dedicated controls. Enjoy live broadcasts, music, or news seamlessly. The FM radio enhances your alarm clock experience, offering entertainment and information at your fingertips.
6.3 Using the AUX and TF Card Modes
To use the AUX mode on your Tzumi 6696DG, locate the 3.5mm AUX input on the back of the alarm clock. Connect your device using an auxiliary cable to play music through the clock’s speakers. For the TF Card mode, insert a memory card into the TF Card slot. The clock will read the music files, allowing you to play and control the audio using the clock’s buttons. Ensure the files are in a compatible format like MP3 for optimal performance. Use the mode button to switch between different input options and adjust the volume as needed. Experimenting with the controls will help you navigate and enjoy your music seamlessly.

Troubleshooting Common Issues
Common issues include the alarm not turning off, dimming display light, and short battery life. Check alarm settings, replace batteries, and ensure proper device charging.
7.1 Alarm Not Turning Off
If the alarm won’t turn off, ensure it’s properly disabled. Check the alarm settings to confirm it’s turned off. If issues persist, replace the batteries or reset the clock. Some users report alarms activating at midnight, possibly due to incorrect time settings. Verify the time and alarm configuration. If the problem continues, consult the user manual or perform a factory reset for resolution.
7.2 Display Light Dimming
The display light may dim due to low battery life. If the light is faint, replace the batteries to restore brightness. This issue often indicates weakened battery power. After replacing the batteries, the display should return to its normal brightness setting. Ensure batteries are inserted correctly for optimal performance. This simple fix typically resolves the dimming issue effectively.
7.3 Battery Life Issues
Battery life issues may cause dimming or loss of settings. Replace batteries promptly if the display fades or alarms malfunction. Use high-quality batteries to maintain functionality. The clock’s settings, including time and alarms, are retained during replacement. Ensure proper installation for reliable performance. Regularly check battery levels to prevent unexpected shutdowns. This ensures the alarm clock operates smoothly and consistently over time. Always follow the manufacturer’s guidelines for battery replacement.

Maintenance and Cleaning Tips
Regularly clean the display with a soft, dry cloth to prevent dust buildup. For stubborn marks, dampen the cloth slightly with water, but avoid harsh chemicals. Replace batteries every 12-18 months or when performance declines. Properly dispose of old batteries to protect the environment. Resetting the clock can resolve minor malfunctions. These simple steps ensure your Tzumi 6696DG remains functional and continues to perform optimally over time.
8.1 Cleaning the Display
To clean the display, use a soft, dry cloth to gently wipe away dust and fingerprints. Avoid using harsh chemicals or abrasive materials, as they may damage the screen. For stubborn marks, lightly dampen the cloth with water, but ensure it is not soaking wet. Wipe in a circular motion, then dry with a clean section of the cloth. Regular cleaning maintains clarity and prevents dust buildup, ensuring optimal visibility of the time and alarm settings.
8.2 Replacing Batteries
Replace batteries by opening the compartment on the back. Use the correct type (usually AA or AAA) to ensure proper function. Insert batteries with the correct polarity, following the diagram inside the compartment. Close it securely to maintain water resistance. Replacing batteries restores display brightness and retains date, time, and alarm settings. Replace batteries when the display dims or alarms malfunction. Always use fresh batteries for optimal performance and reliability.
The Tzumi 6696DG alarm clock is a versatile and user-friendly device, offering reliable timekeeping and modern features like wireless charging and Bluetooth connectivity for a seamless experience.
9.1 Final Thoughts on the Tzumi 6696DG
The Tzumi 6696DG stands out as a reliable alarm clock with advanced features like wireless charging, Bluetooth, and FM radio. Its user-friendly interface and customizable settings make it a great addition to any bedroom. Despite minor issues like alarm persistence, the clock’s versatility and ease of use ensure it remains a top choice for those seeking a modern, feature-rich alarm clock experience.

Additional Resources
For further assistance, refer to the Tzumi 6696DG user manual, available online as a PDF. Visit Tzumi’s official website for support, FAQs, and troubleshooting guides.
10.1 Accessing the User Manual
To access the Tzumi 6696DG user manual, visit the official Tzumi website or search for “Tzumi 6696DG manual” online. The manual is available as a downloadable PDF, providing detailed instructions for setup, customization, and troubleshooting. It includes step-by-step guides for features like alarm settings, Bluetooth connectivity, and FM radio functionality. Refer to it for resolving common issues or understanding advanced features. Ensure you have the latest version for accurate information.
10.2 Online Support and FAQs
For additional assistance, visit the Tzumi official website or authorized support forums. Online resources include FAQs addressing common issues like alarm setup, connectivity problems, and display settings. Troubleshooting guides and user-generated tips are also available. If the manual doesn’t resolve your issue, contact customer support directly for personalized help. Online platforms often provide updated information and solutions shared by other users, ensuring comprehensive support for your Tzumi 6696DG alarm clock.